Showing posts with label Dessert Recipes. Show all posts

Monday, December 30, 2013

Ringing Out the Year... With A Cowl and a Recipe!

Hey Y'all!

Well. Luckily the dentist was able to see me at 11 this morning. After a few x-rays it was determined that I have some nerve issues going on from clenching and grinding my teeth at night. I also have some Crohns issues going on with my gums. So the good news is that it is not a tooth, but something that is not easily fixable. Today I went and purchased a new night guard (since I chewed through my last one) and I have a few tricks up my sleeve from my dentist to help with  my gum issues. I also visited the natural health food store and stocked up on sulfate free, everything else free toothpaste as well. Drastic times call for drastic measures! So. There we are!

Today I wanted to share a quick recipe and an easy to make cowl accessory with y'all just in case you had big New Year's Eve plans! I have never been a big NYE party gal, but I do like to go out to dinner and then get home before all of the crazy folks get on the roads. NYE is one of those nights where I like to be in my house still admiring my Christmas tree lights.

First up... a Yummy Recipe! I don't know about y'all... but here in South Carolina we take our New Year's Day meal very seriously. You must have black eyed peas and some sort of greens. You also have a few other sides as well. With the peanut/nut allergy that I have had to face over the past few years, I have to be very careful about what I make. One of my favorite things to eat is a fruit salad or fruit ambrosia. But some folks put nuts in that and then I can't eat it! I found this great fruit salad recipe on Pinterest right before Christmas and Mom and I took it to a brunch we were invited to on Christmas day. It. Was. So. Good! Also. I didn't take any pictures when I made this!

For Cherry Fruit Salad you will need...
1 (14 ounce) can sweetened condensed milk
1 (8 ounce) container frozen whipped topping, thawed (Bonus points if you use the Extra Creamy version!)
1 (16 ounce) can cherry pie filling
1 (15 ounce) can pineapple chunks, drained
2/3 bag of  miniature marshmallows
1/4 cup chopped pecans (optional.. obviously I DID NOT INCLUDE THIS!)
Directions
First, completely drain the pineapple.Really get all of the juice out. You can save it and drink it later or add to New Year's Day drinks!

Then,  combine all the ingredients except the cool whip and the cherry pie filling. Make sure to mix well. Finally, fold in the cherry pie filling and then fold in the Cool Whip. Be careful not to over mix so the Cool Whip will not fall. Place in the fridge and let the Cherry Fruit Salad chill overnight.
Trust me, it will be hard not to taste this before it is chilled.... but OMG if you wait it is so DELICIOUS!

Note.. this is not my picture... it is from Pinterest. I had my spoon so deep in this concoction that I did not get any pictures!

And... finally a quick cowl for a night out on the town! As I mentioned in my last post, I was very, ahem, creative this Christmas and found a lot of quick to make, great looking presents for friends and family. And this one I promise, even if you are not crafty, you can make!

You will need one ball of Starbella Strata yarn. I found mine at AC Moore. It runs about $6.99 and I had a 50% off coupon and a 15% off teacher discount. This is the Raspberry Jam colorway.


Remove the wrapper from the yarn and pull out three lengths from your nose to the end of your arm extended all the way out. Cut the yarn tube.

Put your hand through the end of the tube like you are stretching out socks or a pair of panty hose.


Stretch the yarn fabric long wise and width wise. Place over your head. INSTANT COWL!


You can make the lengths you measure longer and get a longer cowl. You can get at least 2 to 3 cowls out of one skein of this yarn tube. Nifty!


If you need more help making this cowl... because trust me, I didn't get it at first either... check out this nifty two minute video!


This yarn comes in a few different colorways. I made another one out of the Shipwreck colorway and gave it to my Mom for Christmas.


My Mom promptly went online and ordered ALL of the colors to make cowls for all of her friends!

So that's it for tonight. Go forth and craft and cook! I might hop on tomorrow to do a best of 2013... we'll see!
Tootles!
:) JKP

Sunday, September 8, 2013

It’s Pumpkin Time!

Hey Y’all!

I hope everyone had a great week! I didn’t get to go to any turtle nest inventories this week because of school, but there are several this week that I plan on attending. The last nest in Garden City hatched on Friday, so there will be a nest inventory tomorrow night. I definitely plan on being there. It is the last nest of the season, which is a little sad. I will post pics as soon as I can!

Last night we had a faculty and staff get together at my assistant principal’s house. We had some very yummy barbeque. Everyone had to bring a dish to share. So yesterday morning while drinking my coffee I went on the search on Pinterest to find something quick, easy and delish! Enter the Pumpkin Fall Dip! This is a cinch to make and it is so yummy when you pair it with Gingersnaps! Bonus.. this dip makes A LOT!

To make Fall Pumpkin Dip you will need:

Pump Ingred 

1 15 oz can of pumpkin.. NOT pumpkin pie filling

1 5oz box of vanilla instant pudding (do not make the pudding, just use the pudding powder)

2 tubs of Cool Whip (The recipe calls for plain Cool Whip, but I like to GO BIG OR GO HOME. So I used the Extra Creamy one!)

1/2 teaspoon of pumpkin pie spice

1/2 teaspoon of cinnamon

A bag of Gingersnaps and/or Nilla  Wafers

Combine all of the ingredients except for the Gingersnaps and Nilla Wafers. Mix well.

Mix Well


After mixing, place the dip in the fridge for a few hours. It tastes just like PUMPKIN PIE!

Mixed Goodness

Then serve! Here’s a serving dip…. When you have to go to a party and you need to bring a dish, head to Dollar General! It is one of my favorite stores! For some reason all of my serving dishes are at school. So I headed to Dollar General and picked up a huge serving plate and bowl for the dip for under $2. The nice thing about that is you can always leave the dishes at the party if you need to leave and  you don’t have to worry about getting your serving dishes back! This is great, especially if your dish is still being enjoyed!

Alrighty, I think I am off to the beach to get some reading done. It is so quiet around here because all of the tourists are finally gone. It will be so nice to have some peace on the beach!

Tootles!

JKP

Monday, June 10, 2013

Currently, A Movie Review and What I Have Been Up To!


Hey Y’all!


Well, school is finally over for the 2012-2013 school year. I had to go and work last Friday for a few hours, but then I was FREE. I took a few days to just read, relax and chill. Today I started my first of three graduate classes. And. Gulp. This summer is going to be busy.


Today I took a time out, after I did all of this week’s class reading, of course! I went to see the movie Now You See Me… it was very good and kept me guessing all the way through. If you are one of those folks that can see what is going to happen a mile away, this movie will be very interesting to you. It as very well done and very enjoyable. Go see it!


I have been very busy with the end of school and getting several knitting orders done. I don’t know if it is the weather or me finally coming off of the prednisone, but the joints in my hands have been killing me . So after packing up my room, I really haven’t felt like knitting. I have been doing a lot of reading! My library finally got with this century and decided to do an e book checkout. You can checkout two books at a time and keep them on your device (nook, Kindle, ipad, etc.) for 10 days. I have probably read about 8 books in the past two weeks. It is so great! And, the books are new ones, not ancient ones. I have updated my sidebar with “Reads from the Beach Chair” so you can see what I am reading!

Just in case you watch the weather as much as I do.. you saw that we had this little event last Friday….We had a visit from Tropical Storm Andrea.


Tropical Storm Warning


We had mainly rain and little or no damage. I just hope that this doesn’t set the trend for the rest of the storms this year!

I have also been busy making pies! I had a baby shower to attend on Saturday and my Black Bottom Strawberry Pie was requested. The strawberries were so sweet. It was a darn good pie if I say so myself! I made this one on the fly… I didn’t use my own pie crust. But even with a graham cracker crust, it was yummy!

Stawberry Pie


I have also not lost my “thrifting” ways! Since I am taking 3 graduate classes this summer, I really needed to set up a place to work. I had my laptop on my baker’s rack in my dining room, but really, it was not a comfortable place to work. I went into Goodwill last week and stumbled upon a desk that is just perfect. It is light and on wheels, so it is easy for me to maneuver. So, the baker’s rack went upstairs and I now have a great space to work. Here is the desk before I moved it in the house. Excuse the messy garage. That is on the “To Do” list this summer!
New desk

It has a place for everything and a place for my printer on the bottom. So for $10 I had a mini downstairs office makeover! I am sitting here right now updating the blog on the new desk! I’ll try and get a better picture of it tomorrow.

And, last but not least, here is this month’s Currently from Farley. On the bottom you had to writ three vacation necessities… Mine are a great book, a beach and of course, it would not be a vacation unless I could bring Pitty Pat. Ahh… no vacation for me this year. Just class work! Here’s hoping we can fit in a few roadtrips!


Well, let me run.. Pitty Pat needs his last nightly walk and we are in between storms at the moment.
Tootles!
JKP

Wednesday, December 21, 2011

White Chocolate Covered Popcorn Goodness

Hey Y'all!

Well. I finally made it! I am sitting here in my jammies, drinking coffee and blogging. Ahhhh..... I am so happy to finally be on Winter Break! Pitty Pat even let me sleep in until 8:15 this morning and that was such a gift! He is very excited that I am home. He keeps following me from room to room to see if I am leaving for school!

I woke up this morning, turned on the Christmas Tree(s), brewed some coffee and just took it easy. Every year, right after I get out of school, I always meet my college roommate Rose for lunch. We are carrying on our tradition today! So, I had better make this blog post quick because I am sure she does not want me picking her up for lunch in my jammies. Even if they are cute! :)

As I mentioned a few posts ago, I participated in our school's annual goodie exchange. There were 29 folks who participated this year. I really didn't feel like baking (yes, I think something is wrong with me), but I wanted to do something that was festive and different. So, logged onto my new favorite pastime (Pinterest) and found some great ideas! I finally settled on a recipe for White Chocolate Popcorn. Because let's face it, who doesn't love salty and sweet?

To make the White Chocolate Covered Popcorn you will need:


2 bags of microwaved popcorn (you can use butter, I used light butter!)
16 oz of white chocolate chips melted (melt these over the stove, not in the microwave)
1 cup of M and M's (I used green and red)
2 cups mini marshmallows
2 cups of pretzel sticks broken in half, not crushed
About 1 cup of melted dark chocolate (I got a bag of meltable chips from AC Moore and used those!)
*You can also use about a cup of peanuts too. Since I am allergic to those, I left them out!
2 cookie sheets or jelly roll pans

To start, pop the popcorn according to your microwave directions. Place the popcorn in a big bowl and make sure to remove any unpopped kernels or ones that don't look edible. In another bowl, combine the M and M's, pretzels, and marshmallows.

Over low heat, melt the white chocolate chips. Stir constantly. When melted, pour the mixture over the M and M's, pretzels and marshmallows until evenly coated.


Now, for the next part, you can use a really big bowl, or a huge gallon size Ziploc bag. Since I was making two batches I did both, and they both worked well.

Add the white chocolate covered mixture to the 2 bags of popcorn. Stir or shake well.


Once you see that everything has been covered and there are no clumps, spread the mixture out on a jelly roll pan or cookie sheet. You will need two because the batch is large.  I covered mine with parchment paper. Break up any clumps with your hands. While the mixture is "resting" melt the dark chocolate chips in the microwave. I started at 30 seconds and stirred well after each session. It only took about two 30 second intervals for my chips to melt.


Using a spoon, drizzle over the popcorn mixture. I have a heavy hand and I was very LIBERAL with the chocolate. The more, the better!


Now, pop the trays into the fridge for about 15 minutes. This will allow the chocolate to harden. When you remove the trays from the fridge, you can break apart pieces of the popcorn. Kind of like brittle! Then place in goodie bags if you are giving them away as gifts... or stand there and eat it all!!


Yum!!! Also, have you noticed? I have been cataloging and organizing stuff on the blog! So know you can tell the knitting posts, cooking posts and crafting posts apart!

I hope you have all of your Christmas shopping done... or KNITTED!!

Tootles!
:) JKP

Monday, July 11, 2011

I Pledge Allegiance To Blueberry Cobbler.........

Hey Y'all!

I have a serious weakness in the summer. No. It is not sweet tea, knitting, painting my toenails, watching summer TV, roadtrips or sitting on a beach. Wait. Maybe it is! Well, let's add one more item to that list! BLUEBERRIES. Everywhere I go in the summer, if they sell blueberries, I have to buy them. I love to munch on blueberries throughout the day, put them on my cereal, and add them to my ice cream. But, I also LOVE to bake with them too! And on the 4th of July (one of my FAVORITE holidays, besides Halloween) I was faced with a blueberry coup. They were taking over my fridge. I knew I needed to fight back, and a cobbler was just the ticket!

First, you need to preheat your oven to 350 degrees.

Then you need to rinse two cups of blueberries. Pick off any stems that are left on the berries. Drain them and dry them. Place them in a mixing bowl and then add about 1 tablespoon of cornstarch. After that, add 1/2 cup of sugar. You can add more if you feel your berries aren't sweet enough, but 1/2 cup of sugar is alot for me! Next, add a teaspoon of vanilla extract. Mix all of these items together and then let the berries hang out for a while.


In a bowl or food processor add one cup of all purpose flour, 1/4 cup of sugar, 1/4 cup of brown sugar, 1/3 cup of oats (oatmeal... I used slow cooking oats, but use what you have on hand), a pinch of salt and 3/4 ths of a stick of butter sliced into pieces. Mix the first few ingredients together, then add the butter slices. Using a fork and a knife, cut in the butter with the rest of your ingredients. If you have a pastry cutter, you can use that too. Also, if you have a food processor you can mix this together in that. I have one, I was just too lazy to haul it out. Your object is to have the "crumble" resemble sand with tiny pebbles.

Add the blueberries into a pie plate or baking dish. Add the topping on top of the berries. Bake for 25 to 30 minutes until the top is golden brown and the berries are bubbly.

Before the oven.....

AFTER!!!

You can spoon this out onto plates and serve it warm with your favorite ice cream or whipped cream. It is HEAVEN ON EARTH!


Also, this is a generic cobbler recipe. You can add any fruit and this will work. I am just obsessed with blueberries at the moment. Mmmmmm.... mmmmm... good! Enjoy!!!!!!!!!!!!!!!!!!!!!!!!!!!!!!!!!!!!

Tootles!
JKP

Monday, June 6, 2011

Strawberry Summer Pie!

Hey Y'all!

WAHOOO! School is out and I am on summer vacation! Whoop, whoop! I worked my last workday today. And, I will be spending my day on the beach tomorrow! Ahhh.....

I would also like to give a shout out to the fans of Friendship Bread Kitchen on Facebook! The FBK gave a little mention of this blog on their Facebook page tonight. So welcome if you are new here! We are glad to have you! :)

Now, last night I promised a little write up of a recipe that I made yesterday. I was invited to a luncheon at a fellow second grade teacher's house today to help celebrate the retirement of two dear members of our second grade team.  Now, being southern and all, I know that I can't show up empty handed. My baking has become LEGENDARY.. so I knew I had to pull out the WOW factor. So I started to think about summer pies and summer fruits. And then bingo. It hit me. STRAWBERRY! Also, does anything say summer better than strawberries? For this occasion, I just knew that a strawberry pie was needed. But not any ordinary strawberry pie, something with a surprise to it!

Enter the Black Bottom Strawberry Cream Pie. Thanks Pillsbury! :)

To begin with you will need the following ingredients:
 A pint of strawberries (two cups), 8 oz of cream cheese, strawberry pie glaze, hot fudge sundae topping, ready made pie crusts (yes, I CHEATED!), confectioner's sugar (aka powdered sugar), and whipped topping of your choice. You can even whip up some heavy cream. Our humidity right now is hotter than hell, so I opted for the can. :) Also, this is double the ingredients. I made two pies! One for my luncheon and one for my best friend's visit. Yes, I am nice.

The first thing you will need to do is bake the pie shells for about ten minutes. Now, it is confession time here. This is the FIRST pie I have EVER made! A quick video check from You Tube showed me how to flute my pie crust! Watch that video and you will know the secret of all mankind. Not really. But you will feel very empowered! I am WOMAN. See me flute AND bake a PIE CRUST!


While the pie crust(s) are baking, you need to wash and quarter 2 cups of fresh, yummy, juicy, sweet strawberries. I did four cups due to the two pies. :)


You will also need to mix together 1 cup of confectioner's sugar with one 8 oz package of cream cheese. Do not judge my choice of cream cheese. I am a poor teacher who loves to bake and eat. I must budget!


By now, your pie crusts should be done. Let them cool for about 20 to thirty minutes. Then add 2/3 of a cup of the hot fudge sauce to the bottom of the pie crust. I placed the jar in the microwave for about 25 seconds, and it poured right out! Now, put your crust in the fridge for an hour. I also put the strawberries and cream cheese mixture in there too.

Now, go Facebook. For an hour. Especially Friendship Bread Kitchen! Or me!

After about an hour, take out your cream cheese mixture, your strawberries and your pie crust that has the hot fudge on the bottom. Take the cream cheese mixture and spread it carefully over the chocolate sauce.


 Before and after shot! Good thing I was making TWO pies! How handy! At this point you want to take  your 2 cups of strawberries (4 if you are making two pies like me) and combine it with 1/2 cup of strawberry pie glaze (1 cup if you are making 2 pies.)  Now my strawberries were sweet, so I didn't add much. Also, if I make this pie again, I plan to make my own glaze. Yes, I am such an overachiever!!


                                          No strawberries were harmed while making this pie!

Finally, add the strawberries on top of the cream cheese layer. This is such a yummy part of making this pie!


Then, if you wish, add your whipped cream or heavy whipped cream. Be decorative or free form. Just put the cream on the pie! Then put the pie in the fridge for about another hour. Then dive in!


In the south we have a saying. I you make something really good you say "I put my foot in it!" Now, of course, your foot DOES NOT GO IN THE PIE. It is just a saying that means something is GOOD!!!!

Y'all, I put my foot in this pie!!!!

There wasn't a spec left at lunch today!

Make this for your next lunch or dinner. You won't be sorry! And, I hope you put your foot in it!

Tootles,
JKP

Tuesday, April 20, 2010

Crock Pot Lovin'

Hey Y'all,

Well, summer is in the air!  I am so looking forward to the days of reading trashy novels on the beach, having no where in particular to be and sleeping late. 33 more days folks!

Tonight I was wishing for chicken on the grill and a yummy dessert. Well, I made the dessert part and had to forgo the chicken because it would have taken way to long to thaw! I came across this recipe for Crock Pot Blueberry Cobbler a little while ago. This is the second time that I have made it and I really like it. When I cook with fruit, I think you should taste the fruit, not the sugar you add to the fruit. I really like the way this cobbler comes out because you can really taste the blueberries and the "cobbler" part is sweet without making all of  your teeth fall out. :) I am sure you Splenda fans out there can come up with a way to make this with Splenda, but with my sensitive tummy I can't use it and have to go for the REAL thing! So here's what you need....

Well, of course a crock pot. I have 3 different sizes. I use my medium size one because this cobbler makes about 4 servings. You can double and triple this recipe so you can have enough for a family.
Also, you will need....

1/2 cup all-purpose flour
3/4 cup sugar, divided (1/4 cup and 2 Tbsp)
1/2 teaspoon baking powder
1 pinch salt
1 pinch cinnamon
1 pinch nutmeg
1 egg, beaten
1 tablespoon milk
1 tablespoon vegetable oil
2 cups blueberries (or berry of your choice) (Costco had some great blueberries this week!)
1/4 cup water

Lightly grease crockpot with butter. In a bowl, combine flour, half of the divided sugar, baking powder, salt, cinnamon, and nutmeg. In another bowl, combine eggs, milk and oil. Pour and mix into the dry ingredients until moistened. Place batter in crock pot. *I have been using crockpot liners when I cook this. Less clean up later!


In a saucepan, mix together blueberries, water and the other half of the divided sugar. Bring to a boil and remove from heat.
 
Pour over batter in crockpot. Cover and cook on low for 2 hours. Uncover and let set for 30 minutes before eating.


You can add vanilla ice cream or whipped cream. YUM!

Whew! I am also on a knitting deadline as I type. We are throwing a baby shower for a teacher on my team who is expecting her first baby in a few weeks. So... I have a sweater on the needles. At this point, I don't know if it will be ready by Thursday, but I am working as fast as I can!
 
                                      
Well let me run. Kate Gosslin is in the bottom 2 on Dancing With the Stars tonight. I SO HOPE SHE GETS KICKED OFF TONIGHT!!!!! Yes, I am hateful!
:) JKP

Tuesday, August 12, 2008

Yummy in My Tummy!!!

Hey Y'all!


Well, I did a little re-con this morning and took a drive to school. Let's just say, I have no idea how we are going to be ready for school to open! Our school is under MAJOR construction right now and it is a HOLY MESS! On a lighter note, I can actually get into my portable now, so I will be going in tomorrow and getting a head start on my room.

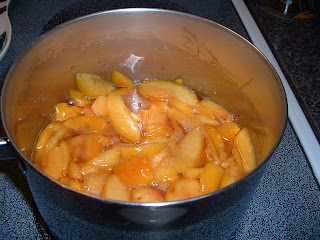
I made Paula Deen's wonderful peach cobbler last night! It was fantastic! To start you need about 4 cups of fresh peaches. I learned a little trick about peaches to make their skin come off quickly instead of peeling them. If you boil a pot of water, turn off the heat and place the peaches in the pot for 30 seconds, then put the peaches in an ice/water bath for a minute or so, the skin of the peach literally rubs off with your fingers. Then you can slice them up!

Here are my peaches, with cup of sugar and a cup and a half of water. You bring this mixture to a boil, and then simmer for 10 minutes.


My yummy simmering peaches!! My house smelled so yummy!


While the peaches are simmering, you make a batter with sugar, milk and self rising flour. You slowly mix all of these together. Pour the batter into a 3 quart dish. When the peaches are done, you add them and then carefully pour the peach "syrup" on top of the fruit. The batter will rise to the top as the cobbler bakes.


Into the oven it goes, 350 for about 35 minutes.


Out of the oven, warm and bubbly!


On the way to my tummy!

This recipe was very easy and the results were fantastic! I admit, I even had this for breakfast this morning!
Cheers!
:) JKP